Showing posts with label Simple Food. Show all posts

5.10.2017

Simple Kids: Making time for our family and Popcorn Recipe


Last week I had one too many distracted days - instead of going through our normal morning routine of preparing a couple of cups of warm milk, pouring one of coffee for myself and lots of wake-up time on the couch, I found my mind being preoccupied with tasks to be finished, floors to be mopped and laundry to be done, while absent-mindedly refilling two sippy cups. It was a sort of disconnected week, I fear. 

At the end of the week, I felt we were in serious need of an afternoon with lots of laughter, snuggles, and kisses. An afternoon of Pre-Mother's Day quality time for our family. 


We had beautiful weather on Sunday, so we decided to collect all the blankets we could find, laid them on the grass watching JC built a fire for roasting S'mores. 

You see, even though I'm at home with them, striving to include them in daily homemaking activities, while also emphasising on the role of imagination in learning, encouraging their intellectual, practical and artistic development especially during their early childhood years, I do occasionally cease to hum songs and get caught in a rut. Hands-on activities decline and I clearly notice the change in rhythm in their creative play.


So this past Sunday, we made the day all about family. After church that morning, I chopped up some of our favorite fruits and popped some corn (recipe below), while the kids helped collect branches for the fire. 

Watching them run around in anticipation was heart warming. They played tag together, covered and uncovered their blankets, and snug some chocolate while I wasn't watching. Our batteries were recharging more and more with each Marshmallow.


As the sun set slowly and the air turned cool rapidly, we moved our family day indoors. After a quick bath, we settled in our favorite comfy spot, grabbed the popcorn and I turned on a good wholesome cartoon for them. That night I chose Theo for us, a cartoon off of PureFlix,. We don't have TV service at our home and we exclusively rely on streaming. PureFlix offers a wide variety of faith and family friendly movies that I don't hesitate for my children to watch. And on a side note, they currently offer a free month trial if any of you are interested. 

After they were in bed, JC and I snuggled up together and continued our quality time with another movie, while finishing off the last of the popcorn. All in all, it was a wonderful day with the kids and if I may encourage you, Mother's Day is just around the corner, if you are not the gift giving type or if you are, but would like to add that extra little something, go and spend some time with your loved ones. It doesn't have to be all elaborate with a fire and S'mores, but maybe curling up in your favorite spot, with your favorite snack, and a family friendly movie might just do the trick.


Popcorn Recipe:


3 TBSP Oil 
1/3 c popcorn kernels
3 TBSP butter
salt to taste

1. Add the oil to a medium pot that has a lid. Place 3 kernels of corn in the oil, close the lid and let sit on medium-high heat until you hear the three kernels pop.

2. Remove the pot from the heat, add the 1/3 cup of kernels, close the lid - and now this is important - count to 30. Out loud. 

3. After you counted (you did, right?) return the pot to the heat, lift the lid ajar and proceed by shaking the pot softly all through the popping. Once the pops cease, take the pot off the heat and empty the popcorn into a bowl.

4. Add the butter to the hot pot, once it is melted, pour it over the popcorn and gently mix to coat.

Enjoy and live loved!


Also sharing here.
This post was not sponsored but partnered with Pure Flix, all opinions are my own. 

4.04.2017

Simple Foods: Sweet Potato, Red Lentil and Coconut Soup Recipe


After spending most of this winter snuggled up inside in front of the fireplace, book in one hand, hot chocolate in the other, we are two weeks into Spring now and ready to face the warmer season of the year.

And what a season it will be.

Some of you already know, but I've kept it pretty quiet overall - we are adding on to our family, god-willing,  this summer.

And where long and cold days beg for warming winter soups, they are also a fine way to help cope with those early miserable days and weeks of baby growing. So we ate them, lots of them. Taco soup, chicken noodle soup, roasted red pepper soup, butternut squash and carrot soup, you name it we had it.

So if you're a soup person like me, here's an easy recipe for you adapted from here:

Red Lentil, Sweet Potato and Coconut Soup

2-3 medium sized sweet potatoes
2 red onions
1/2 tsp cumin seeds
1 tsp ground coriander
olive oil
4 cloves garlic
1 fresh red chili
1/2 bunch fresh coriander (optional - our family is not a big Coriander fan)
125g red lentils
1 L vegetable stock, heated
1 can light coconut milk (400ml)
1 lemon

How to:

1. Preheat oven to 350 F
2.Peel and dice sweet potato in 1 inch thick chunks, peel and cut onions into 1 inch thick wedges. (I had baked sweet potato left over from a previous dinner and used them instead of roasting fresh ones)
3. Place vegetables on a roasting tray in one layer, sprinkle with cumin seeds, coriander, salt and fresh pepper. Roast for 40 to 45 minutes - since I had already cooked sweet potatoes, I just peeled them and roasted the onion in a pan.
4. Peel and finely slice garlic, followed by finely slicing the chili. If using, pick coriander leaves and set aside, finely slice the stalks.
5. In a large saucepan, on medium-low, heat about a tablespoon or two of oil. Saute the garlic, chili, and coriander stalks until lightly golden.
6. Add the red lentils to the pan, stir to coat well. Stir in the heated vegetable stock and coconut milk.
7. Increase the heat and gently boil, reduce to a simmer and cook lentils for about 20 minutes.
8. Once the vegetables are ready, carefully add to the saucepan, together with most of the coriander leaves.

If you have a submersion blender, blend the soup to desired thickness. I recently minimized ours, thus I transferred most of the soup to the blender and (carefully!) blended until smooth. A few pieces were left un-blended for some chewiness.
Another option is to just mash your vegetables with a wood spoon as desired. It's your soup, prepare it the way you like it :)

9. Lastly, squeeze in some fresh lemon juice and season to taste.

Enjoy!

This soup is also on my list for nursing friendly soups. More on that topic very soon y'all!

Live Loved!


Also sharing with some of these

12.23.2016

Simple Food: Holiday Butter Cookies


If you've seen my Instagram lately, you know we've been baking up a storm in this house. Whisks are whirling, spoons are spinning, peppermint is filling the air, and honey has been melting on our tongues. Mouthwatering scents of fresh out of the oven cookies suffuse our home as of late. Baking has been such a joy, especially now that e is getting older and can join in on the fun.

I've had a few requests for recipes that we've been baking and here is one of them. This one is done pretty fast and easy for kids to help with. e loved using the cookie cutters {which kid doesn't ha!}. And parents - these beauties are great coffee dunkers. Just sayin'. 


Butter Cookies

Ingredients:

500g all-purpose {unbleached} flour
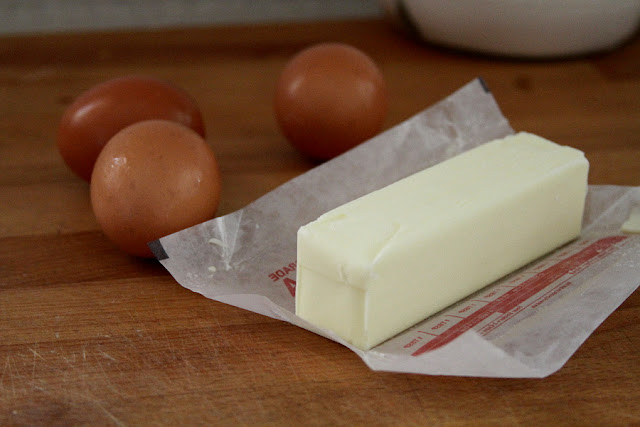
2 sticks unsalted butter - in pieces
200g sugar {I prefer pure cane sugar}
2 eggs
1 tsp vanilla flavoring
1 lemon - zested and juiced
1 tip of a knife ground cinnamon

Icing:
1 egg yolk
sprinkles of your choice, coarse salt, or chopped almonds

Directions:

1. Combine Flour, sugar, and butter in a bowl
2. Make a groove in the center and add eggs, vanilla flavoring, cinnamon, as well as lemon juice and zest. 
3. Start kneading. I encourage doing this by hand, not with a machine. 
When done, wrap in plastic and chill for at least 30 Minutes. 
4. Pre-heat oven 350 degrees Fahrenheit and line a baking sheet with parchment paper
5. On a lightly floured surface, roll out the dough about 1/4 to 1/2 inch thick
And now the fun part - begin cookie cutting.
6. Bake about 10 Minutes, let cool 2 Minutes on the baking sheet, then cool completely on a wire rack. 


7. When completely cool, brush egg yolk on the tops of the cookies and cover with desired sprinkles.


12.03.2016

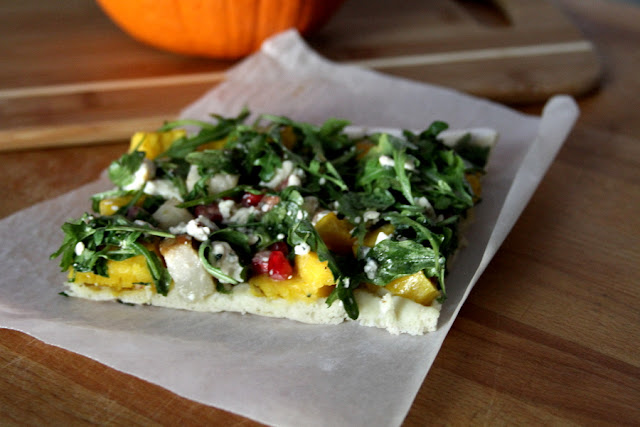
Simple Food: Arugula Pear Pizza


Fall means change. And fall also means colder temperatures and shorter days. And with anything in dwindling supply, the number of hours we spent outdoors have gone down, in equal relation to the number of hours that nighttime falls upon us earlier.

Similarly, fall also means stuffy noses, chunky sweaters, and boots running through a sea of brown dried leaves in the backyard. The harsh crunching as they break under even the lightest Toddler weight. But my favorite part of fall so far has been the pumpkin, and butternut squash, and sweet potatoes. Here lately my farmer's market visits have me almost always leave with either one of them and I come home baking rich fall dishes.

As a sweeter side of fall is approaching - and we all know it will, as Thanksgiving came and went already - we can embrace the Holidays with its delicious roasted turkey, pumpkin pies, and hot chocolate and save this recipe for a lighter pick-me-up meal in between all the festivities.

Arugula Pear Pizza

Ingredients:

1 recipe pizza crust {or store bought if you prefer}
half of a 3 lb pie pumpkin seeded, peeled, and cut into desired pieces 
1 pear, peeled and cut into slices
Salt and Pepper to taste
Olive Oil

2 c Arugula leaves, loosely packed
1/2 c of crumbled bleu cheese
seeds of half of a fresh pomegranate
1 tsp red wine vinegar


Directions:

1. Preheat oven to 425 degrees Fahrenheit
 Roll out the pizza dough on a baking sheet {or Pizza Stone}


2. In a large bowl, toss together the pumpkin pieces, pear pieces, Salt and Pepper with 1 Tbsp olive oil
3. Arrange the mixture on the prepared pizza dough and bake 20 minutes
4. Meanwhile, combine Arugula, bleu cheese and pomegranate seeds with 1 TBSP olive oil and spread over the pizza once it comes out the oven.

Enjoy


 Also shared here

11.11.2016

Recipe Weckmänner


Today is St. Martin's Day. As dark cold days are approaching and I think about ways to lighten up the fall mood around here, I make a coordinated effort to move away and brighten, as much as possible, the darker days in our home. 

Here is something I have noticed while raising my children - rediscovering traditions of my own childhood and looking forward to creating memories with our own family. Legend has it, that St. Martin, a roman soldier, met a scantily dressed beggar at the gates of Amiens, asking Martin for  help. The soldier, not having any money or food to give to the beggar on this cold night, parted his cloak in two with a single swipe of his sword, giving one-half to the beggar while keeping the other for himself. It is said that after this night, Martin was baptized and left the army. 

On the days leading up to and on the night of November 11th, you can find children walking in procession through the streets with their handmade lanterns, singing songs of praise and light to St. Martin. They are led by a man on a horse, meeting at a bonfire at a public square or school yard, where the story of St. Martin is retold through a play. While the origin of the lanterns is unclear, they may have come from the bonfire, symbolizing the light it brings in a dark night, as St, Martin brought a flicker of hope to the poor at his time. 

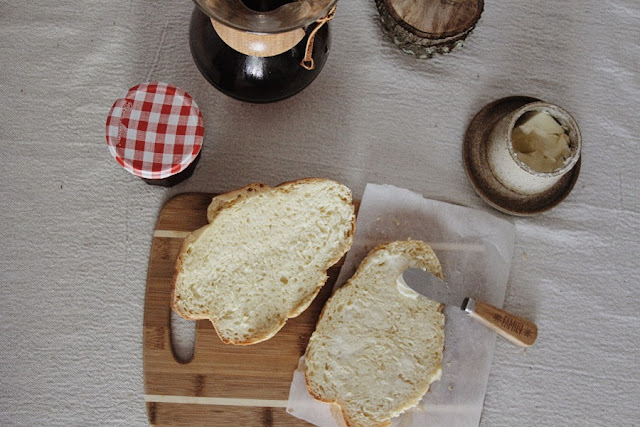
The night singing around the bonfire ends with hot chocolate, mulled wine, and Weckmänner. Growing up receiving and enjoying a Weckmann was always a memorable end to our evening. For e and j's Weckmänner below, I used a Hefezopf recipe {if you're German, click here)} I followed the recipe very loosely, with the main exception that instead of braiding the bread I formed four little men. And I used all purpose flour with great results.


Weckmänner

Ingredients 

{I encourage you to weigh the ingredients if possible as it yields better results}
500g all purpose flour
1/2 tsp vanilla flavoring
1 envelope dry yeast {the German recipe calls for 18g fresh yeast which would be better}
200 ml cold milk
75g sugar 
2 eggs
2 egg yolks
90 g butter, softened
1 tsp salt
1 tsp lemon juice {original recipe calls for lemon zest}


Directions

1. Place all ingredients in a kitchen aid type bowl, knead all ingredients on low about 10 minutes, then up the speed and continue kneading for an additional 5 minutes
2. cover the dough and let rest/rise 1 hour
3. divide dough into 4 equal parts, cut your arms and legs using kitchen shears or preferred tool
4. brush the men with egg, add your face and buttons, cover with foil and let rest another hour
5. bake in preheated oven 350 degrees F for 35 minutes. 
6. enjoy while still warm with fresh butter and jam


What about you? Do you have St. Martin's Day traditions?

sharing with some of these blogs


11.02.2016

Simple Food: Ginger Pear Crisp


When you are embracing fall, with it's still somewhat warm sunny days and a brisk wind that is blowing more and more leaves off the trees, covering the lawn in a blanket of browns and yellows, and the first fire is crackling in the fireplace as it is the moment I'm typing this, I can't imagine a better dessert than a fresh pear crisp to complete a seemingly perfect autumn night. But then again, if the weather is not quite cooperating with summer temperatures still lingering in the air and the windows still open all day, baking this crisp filled with fruit and cranberry, topped with vanilla bean ice-cream, still sounds like a good idea.  This kind of dessert is great no matter what the weather decides to do, I think.

I looked at a few different recipes, but always seem to fall back on one of my two favorites, adapted to our own taste preferences. Instead of using store-bought gingersnap cookies, however, I chose to use homemade instead. It gave e and me a wonderful morning of baking and bonding in the kitchen. To me, the extra work of homemaking is worth the time. On the other hand, if time is an issue, the store-bought alternative will work just fine.


Cranberry Peach Crisp


    Fruit Mixture
  • 1 can (16oz) whole berry cranberry sauce
  • 2 TBS all-purpose flour
  • 5 medium pears, peeled and sliced

    Topping
  • 1 cup (about 15 cookies) coarsely crushed gingersnap cookies 
  • 1/2 cup all-purpose flour
  • 2 TBS brown sugar

Directions:

1. Preheat oven to 375 degrees F
2. In a medium bowl, mix all the ingredients for the fruit mixture
Pour into a medium to large oven safe dish
3. Prepare the topping by mixing all the topping ingredients together
Sprinkle over the fruit mixture
4. Bake 30-35 minutes or until pears are tender and topping is golden brown, remove from oven and let cool slightly
Enjoy still warm with vanilla ice cream if desired


Sharing with some of these beautiful blogs

10.26.2016

Mummy Cookies


Temperatures have dipped again a little this week. It feels more like fall than summer now, which is great considering Halloween is right around the corner already. This year I've been embracing fall with all its might, crunchy leaves, deep blue skies, and even the too warm temperatures.  I've been eyeballing Thanksgiving dishes for a while now, eager to get busy in the kitchen baking fall treats. 

But, alas, we still do have a few more days to go until November. Pumpkin spice for Mummy Cookies aside, we are still in Halloween mode over here.

All year round I've been making simple chocolate chip cookies or sugar cookies to share with our morning or afternoon cuppa. But then I came across our gingerbread cut out one day when e was playing with her playdough and I remembered seeing a Mummy Cookie online somewhere, which gave me the final nudge to give it a try also, using said gingerbread cut out. So we got busy in the kitchen yesterday afternoon. 


Mummy Cookies

1 c (2 sticks) unsalted butter, softened
1 c sugar
1 egg
1 tsp vanilla extract
1/4 melted chocolate chips
2 TBS cocoa powder 
2 tsp pumpkin pie spice
3 c flour (unbleached)
2 tsp baking powder
1 tsp salt

Instructions

1. preheat oven to 400 degrees Fahrenheit
2. in a mixing bowl, add butter and sugar - beat on medium speed until combined.
3. add egg, vanilla, melted chocolate chips, cocoa, and pumpkin spice - mix well
4. add flour with baking powder and salt, one cup at a time, mix until well combined, scraping the sides of the bowl as needed.


5. roll out dough about 1/4 to 1/2 inch thick (mine worked better on the thicker side)


6. punch 'em out and bake on a cookie sheet for 9- 12 minutes


7. let cool completely before icing with royal icing (small tip if available)


sharing this recipe with some of these blogs

10.19.2016

Simple Food: Fall Harvest Snacks


This time of year calls for candy. And lots of it. The internet is full of mouth watering recipe ideas that I would love to bake and eat them all. Combine that with all the fall desserts and we are in for some delicious fun! But, I also have kids. My kids and too much sugar is not a great combination. {Is it ever?}


Therefore, to keep our snacks a bit on the healthy side until the big night, I searched Pinterest for some healthy fall snack ideas.  

In any case, below are a few snack ideas we recently have had in our house. e was very fond of the Candy Corn-ish snack, while j preferred the grapes and tangerines. I homemade the whipped cream on top of the pineapples and tangerines off of this recipe. I also like to have it in my afternoon cuppa, it hits the spot quite well I say. The eyes and mouth were drawn on the glass with a Sharpie {gasp}, but no worries it washes right off. All of the snacks are definitely keepers for us. 


Featured on --
link party featured


10.14.2016

Jello Worms


We are only a month into fall, and I already see more pictures of gorgeous orange pumpkins and stunning fall foliage than I can count. Not to mention all the chunky sweaters and boots we are all digging out of our closets right about now. In acknowledgment that shorter and colder days are heading our way, and I still can't seem to get used to the idea that summer, pool, and sandals are done for this year, I have been baking a little something with e every week to get myself into this thing called fall mood. 

Up this week, worms, especially after last week's {not so} happy encounter with a garden spider and the spider cookies.

I'll be the first to admit, as I have grown older I have gotten worse and worse when it comes to little bugs and spiders. Believe me, I want to show my daughter it's ok to hold them and love them and not be a screaming hot mess, but that's just it. I'm a screaming hot mess when an itsy bitsy spider gets too close.  

Still with me? Good. Now back to the worms, thank you. Worms, mind you, I can handle them a lot better. They're just slimy. 


Gelatin {Jello} worms 

Ingredients:

1 pack of raspberry Gelatin* {regular size, not family size}
2 envelopes of unflavored Gelatin
3 cups boiling water
3/4 cups heavy whipping cream
green food coloring* {optional}
Glas Jar
about 120 plastic straws **


Directions:

1. In a large bowl, prepare flavored and unflavored Gelatin with 3 cups of boiling water. Place in the fridge for about 20 Minutes until luke warm.

2. During this time, prepare straws by pulling out the flexible part on.each.one. Place the straws with the flexible part down into the glass jar.


3. Prepare the whipping cream by dropping in and combining about 15 drops of green food coloring {if using}. Add the whipping cream mixture to the red gelatin. Mix 


4. S L O W L Y pour the whipping cream-gelatin mixture over and into the straws. You will notice the jar will fill up as well as the inside of the straws. Pour in as much of the mixture as possible {mine happened to go all in}

5. Place in the fridge for 8 to 24 hours, or in the freezer for 4 hours, which is what I did and it turned out well.


6. Once the gelatin has set, remove the straws from the jar, one by one and hold them one by one under running hot water for a few seconds. Now you can squeeze the gelatin out.of.each. straw into a container.
The separation of the red gelatin and the whipping cream is normal and adds a more natural flair to the worms. 

7. Take the worms to your friends' house and enjoy their reactions {insert smiley face}. 


* We are a Red 40 free household and our gelatin was colored naturally with beets instead of artificial colors. I did use green food dye as I still had some left over, but my next batch will be made without any kind of artificial dyes.

**P L A S T I C {sigh} We are downsizing and these plastic straws have been in our cabinet for almost the last decade, which means we hardly ever use straws in our house. I used up a good bit of them. While I'm tempted to give it a try with paper straws, I wouldn't know how to get the worms out of them after they set. Has anyone any advice on that? 

Sharing this post with these wonderful blogs.